Cove Lighting Layout: Inputs to Fix Before Selecting an LED Strip
Fix the cove section, viewing lines, receiving surface, electrical branches, control zones and service route before selecting a strip.
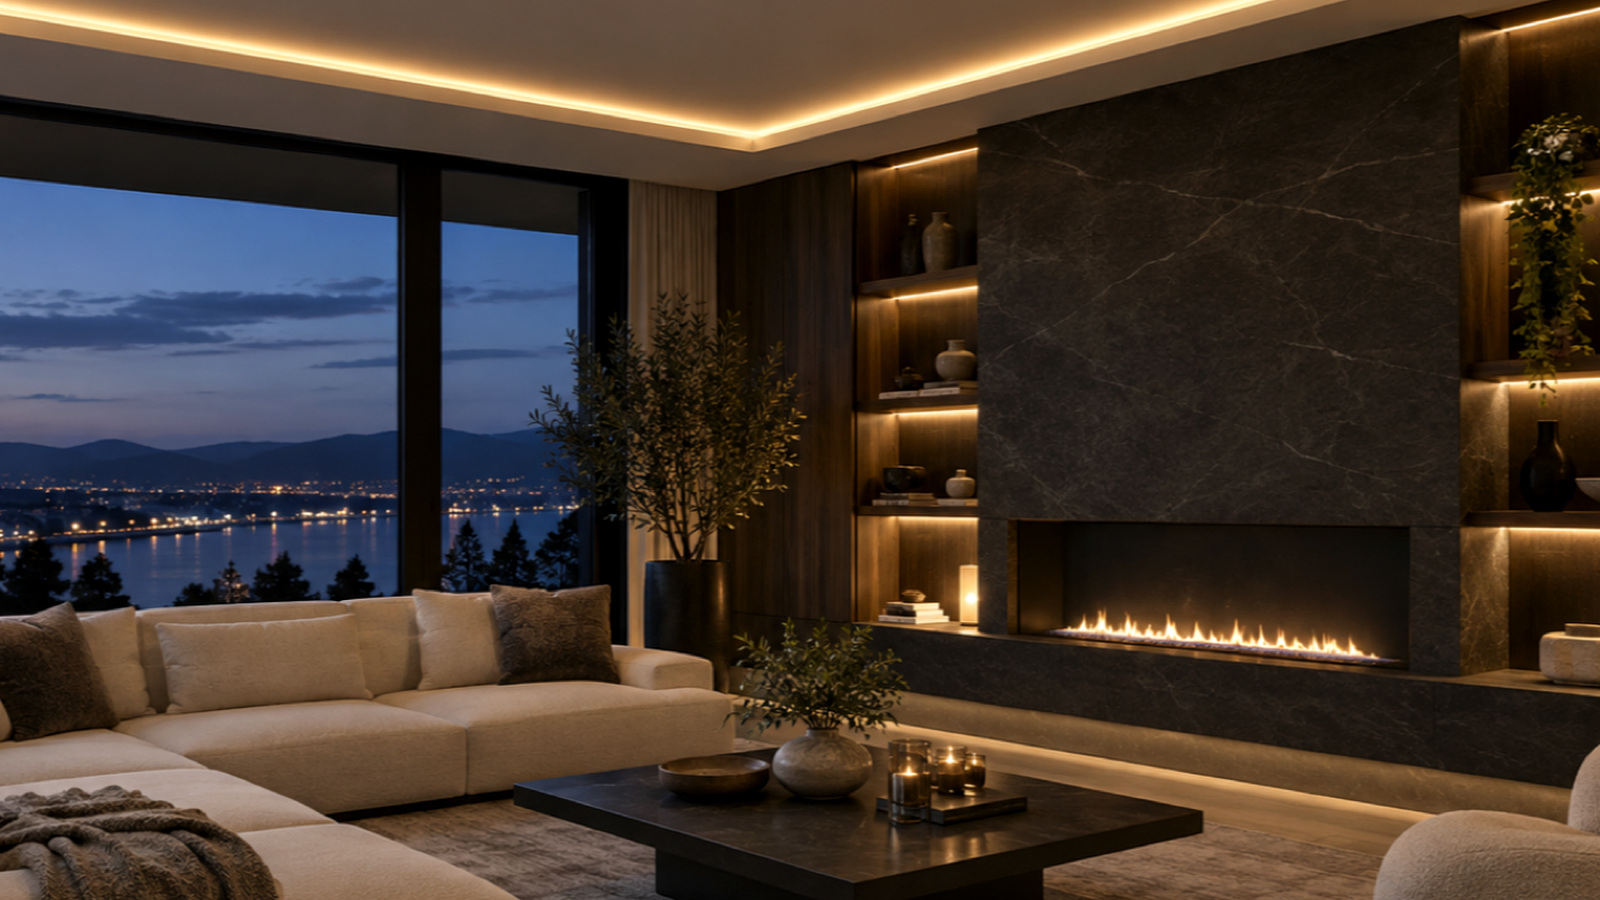
A cove-lighting layout should be fixed in section before an LED strip is selected. The section defines whether the source is visible, where light lands, how surfaces reflect it, how long the electrical runs are, where feeds and control zones belong, and whether the strip, profile, driver and connections can be serviced. There is no universal setback or profile position: compare candidate geometry in the actual cove and viewing conditions.
Draw the cove section before choosing a strip
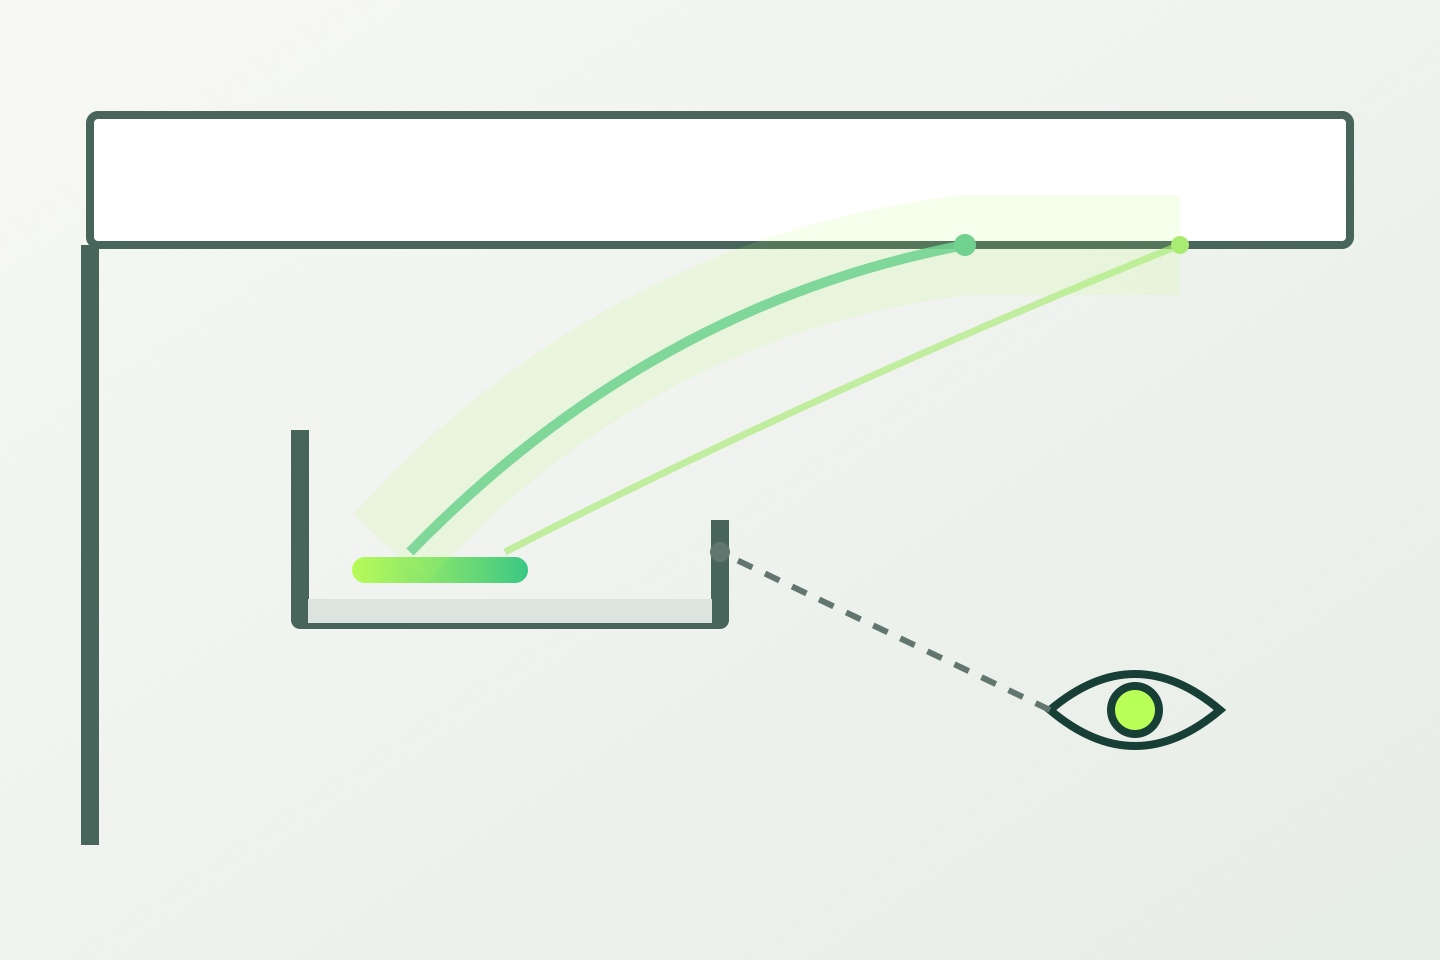
Prepare a dimensioned section through every distinct cove type. Show ceiling and wall planes, cove lip, recess, intended strip or profile position, likely viewing lines and access route. A plan alone cannot show whether occupants will see the source or whether the cove blocks useful light.
Record:
- cove width, depth and lip geometry;
- strip position and aiming direction;
- distance to the illuminated wall or ceiling surface;
- primary viewer locations and eye lines;
- surface material, color and finish;
- obstructions, joints and level changes;
- access panels or removable elements.
Aiming and dark-zone review
| Section to draw | Surface receiving the light | Dark-zone risks to inspect | Service and feed check |
|---|---|---|---|
| Source aimed upward to the ceiling | Ceiling underside and adjacent upper wall | Cove lip shadow, short throw creating a bright band, ceiling unevenness, beams or services interrupting the wash | Keep feeds, joints and removable components reachable from the planned access route |
| Source aimed toward a wall or vertical receiver | Wall face above or beside the cove | Obstructions, surface waves, joints, texture changes and excessive concentration near the source | Check cable exits and joints without placing them behind permanent finishes |
| Source aimed inward across a tray or shelf | Internal tray, shelf or secondary reflecting surface | Self-shadowing, trapped bright zones, blocked paths and finish variation before light reaches the room | Confirm that the profile, connections and driver route can be inspected and removed |
| Corner or level transition | Both receiving surfaces across the change in direction or height | Dark corners, doubled bright zones, structural interruptions and inconsistent surface finish | Draw the transition joint, feed responsibility, isolation point and replacement path explicitly |
Compare every direction and transition in the actual section or a representative mockup. The table does not declare one aiming direction best or prescribe a setback, angle or output.
Use living-room cove lighting for context, then replace generic concepts with the project's actual section.
Control direct view and reflected glare
The first visual question is not brightness; it is what the viewer can see. Check sightlines from entrances, stairs, seating, beds, upper floors and reflective surfaces. A strip concealed from one position may be visible from another.
Also inspect reflected images in glass, polished stone, metal, glossy paint and dark screens. The cove lip may hide the source directly while a nearby surface reveals it.
Do not use one universal setback. Compare locations by reviewing:
- source concealment from the agreed positions;
- distribution across the target surface;
- bright bands, scallops or dark edges;
- reflections and glare;
- tolerance to construction variation;
- space for the selected profile, connectors and cable exits.
A physical mockup or representative section can answer these questions more reliably than a rendering that does not reproduce material reflectance or actual output.
Coordinate surface finish and light distribution
Indirect lighting depends on the surface that receives and redistributes the light. Color, gloss, texture, flatness and joint quality can alter the visible result. Record the final finish rather than evaluating only a primer or unfinished mockup.
LED products also vary in light distribution, color and efficacy, and overall performance depends on fixture and optical integration.1 Compare exact strip/profile candidates under the representative cove geometry. Avoid claiming a specific illuminance or perfectly uniform line without a reviewed photometric method and verified product data.
Review profiles and diffusers as candidate components for shielding and optical geometry, then verify the exact fit and sample result.
| Geometry input | What to review | Evidence |
|---|---|---|
| Strip position | Concealment and distribution | Dimensioned section and sample |
| Aiming direction | Target surface and spill | Section/elevation review |
| Cove lip | Sightline control and shadow edge | Viewer-position checks |
| Surface finish | Reflection, color and visible defects | Approved finish sample |
| Profile/diffuser | Fit, light spread and service | Exact component data and mockup |
| Construction tolerance | Sensitivity to misalignment | Detail and site-quality plan |
Plan runs, feeds and power by branch
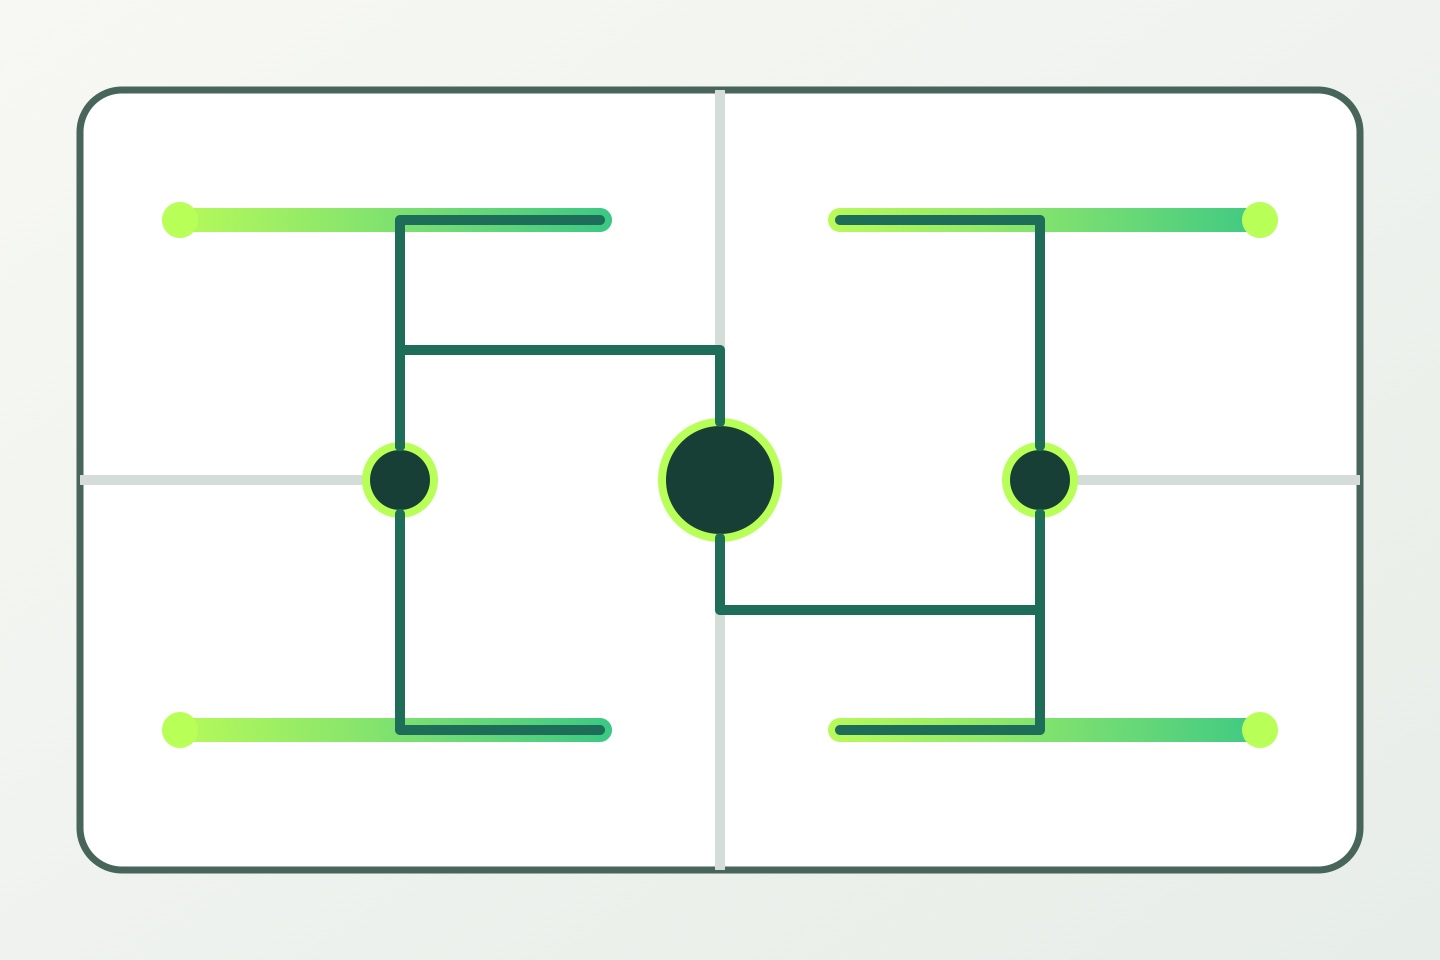
Translate the architectural line into electrical branches. Mark the length of each branch, driver-to-feed distance, joints, corners, level changes and accessible feed points. Do not treat the total perimeter as one continuous run without checking the selected strip and system instructions.
Do not place feeds or joints at the least serviceable corner or inside a permanently closed detail. If architectural joints, control-zone boundaries and electrical branches do not align, label all three separately on the drawings.
Calculate each branch load from verified power per unit length. Use the exact driver's loading and derating rules. Voltage drop depends on current, conductor resistance, path and connections, so conductor and feed planning needs a reviewed calculation rather than a universal injection interval.2
Consider whether the layout can be divided at architectural breaks, access points or control-zone boundaries. Every additional feed must be included in the drawing and protection plan.
Review published flexible LED strip categories only to organize candidate discovery. The category does not confirm voltage, continuous length, power, compatibility or availability for the project.
Choose control zones around use and operation
Control zones should follow how the space is used, not only how the ceiling is wired. Record which coves operate together, which require separate dimming or scenes, and how users control them. Hospitality, residential and commercial projects can have different schedules and commissioning needs.
Define:
- normal operating scenes;
- independent zones and their boundaries;
- dimming or control interface;
- switching and schedule behavior;
- default state after power restoration;
- commissioning responsibility and retained settings;
- access to controllers, amplifiers and drivers.
Check visible transitions where adjacent zones meet. Two separately controlled branches may create an obvious discontinuity if their ends or scenes are not coordinated.
Preserve installation and service access
The cove detail must leave enough space to install and replace the strip, profile, diffuser, connectors and cable. Identify how installers reach corners, joints and end treatments after ceilings and finishes are complete.
Keep drivers and controllers in locations that meet their instructions and remain accessible. Do not bury equipment behind permanent finishes. If a removable panel or access hatch is required, show it in the architectural package and coordinate it with the interior design.
Service planning should identify isolation points, replaceable section lengths, diffuser removal, spare identification and the surfaces disturbed during work. A continuous visual line can still be designed as serviceable sections.
Review a representative cove mockup
A mockup should reproduce the critical section, surface finish, strip/profile candidate, diffuser, operating scene and viewing positions. If a full-length mockup is impractical, include at least the transition or corner most likely to reveal a problem.
Review:
- direct view from agreed positions;
- reflected glare on nearby surfaces;
- distribution and shadow edges;
- visible points or bands;
- color appearance on the final finish;
- dimmed-state behavior where required;
- joint and corner transitions;
- access for installation and replacement.
Document the setup, product revisions, operating condition, photos, reviewer and decision. Approval applies to the recorded geometry and materials.
Turn the Approved Cove Section into a Product Shortlist
Build the shortlist backward from the recorded cove section, viewing positions, receiving surface, electrical branches, control zones, environment and service route. Product families help discover candidates, but each final comparison must return to an exact product URL or SKU, its documented configuration, and a representative sample or mockup. Review COB LED strip candidates and SMD LED strip candidates as starting points—not as proof that every product in a family will suit the approved cove.
| Approved project input | What to compare in the shortlist | Procurement evidence or output |
|---|---|---|
| Cove section, viewing lines and receiving surface | Finished strip/profile envelope, diffuser need, light distribution and risk of visible points | Dimensioned data, exact component information, and a representative sample or mockup; COB does not guarantee a dot-free result in every geometry |
| Branches and feed plan | Exact voltage, verified power per metre, cut unit, and the permitted run and feed arrangement for each candidate | Model or SKU data and a calculation for each branch; do not assume one maximum run length or universal power-injection interval |
| White-light, color and control tasks | Color-temperature or color architecture, documented metrics such as CRI only where supplied, and the dimming or control interface | Control-requirement schedule and candidate interface data; products from the same family are not automatically compatible |
| Environment and service conditions | Protection and connection method, plus access to profiles, connectors, drivers and controllers | Installation conditions and a replacement path; do not extend IP, accessory or performance claims from an image or family name |
| Procurement package | Exact product URL or SKU, quantity, destination, sample or mockup criteria, and separately required profiles, drivers, controllers or connectors | A complete input set that ULANTU can review and quote without implying current inventory, price, MOQ or lead time |
Use the density, diffuser and profile-depth guide to organize the optical-distance and diffusion review. Use the power-supply sizing and voltage-drop guide to prepare branch calculations from verified candidate data. Keep each candidate's geometry, electrical configuration and control interface together so the shortlist remains comparable.
Cove-layout checklist
- Every distinct cove type has a dimensioned section.
- Viewer positions, direct sightlines and reflective surfaces are marked.
- Final receiving-surface color and finish are specified.
- Strip/profile position and aiming direction are shown.
- Construction tolerances and obstructions are reviewed.
- Exact strip and profile candidate data are attached.
- Runs are divided into electrical branches.
- Branch loads, conductor paths and feed points are documented.
- Control zones and scenes match the operating brief.
- Drivers, controllers, joints and ends remain accessible.
- A representative mockup has named acceptance criteria.
- Approved revisions and commissioning information can be retained.
Submit a cove-lighting brief
Send the cove sections, reflected ceiling plan, surface finishes, viewer positions, run schedule, control zones, exact candidate product URLs or SKUs, required quantity, destination, access strategy, sample or mockup criteria, and unresolved questions as one package.
For review, submit a cove-lighting brief. An inquiry does not confirm design approval, photometric performance, compatibility, availability, price, lead time, compliance or an order.
Sources
[1] U.S. Department of Energy, “LED Basics”. General context on LED light distribution, color and fixture integration; not a project photometric claim. Accessed 2026-10-04.
[2] OpenStax, “Ohm's Law: Resistance and Simple Circuits”. General V = IR relationship; cable and feed decisions still require exact project inputs and review. Accessed 2026-10-04.
Compare matching products.

5V 8mm COB LED Strip Kits with Six Switch Options
COB strip kits with 252 or 320 LEDs/m, warm-white or white light, and six control or battery-box choices.
ULT-66C69891 · 120 configurationsFrom USD 1.36 for this configurationReference priceView product
U-Shape Aluminium LED Strip Channel
A broad family of aluminium and PC channel configurations for surface or recessed linear lighting, with multiple cross-sections, flanged versions and cover colors.
ULT-1F3EFBF9 · 163 configurationsFrom USD 0.16 for this configurationReference priceView product
5V/12V/24V Addressable RGB LED Strip
An addressable RGB strip family with WS2811, WS2812, WS2815 and 16703 configurations across several voltages, widths, densities and protection types.
ULT-A6C5867D · 24 configurationsFrom USD 1.41 for this configurationReference priceView product
5V USB COB LED Strips with Switched and Unswitched Leads
Fixed-colour COB strip configurations with USB leads, selectable PCB construction and optional inline switches.
ULT-B08A98D9 · 144 configurationsFrom USD 0.96 for this configurationReference priceView productQuestions about this guide.
Answers below restate the layout framework in this guide. There is no universal setback or aiming rule—compare candidate geometry in the actual cove and viewing conditions.
What is the first step before choosing a cove LED strip?
Draw a dimensioned section through every distinct cove type first, showing ceiling and wall planes, the cove lip, recess, intended strip or profile position, viewing lines and access route. A plan view alone cannot show whether occupants will see the source.
Is there one correct setback or aiming direction for cove lighting?
No. Setback and aiming direction depend on the actual cove section, surface finish and viewing positions. Compare candidate positions on the real section or a mockup rather than applying one fixed rule.
How do I avoid seeing the strip or hot spots in a finished cove?
Check direct sightlines from entrances, stairs, seating and upper floors, and also check reflected images in glass, polished stone, metal and dark screens. A physical mockup answers this more reliably than a rendering.
Can I order a sample for a cove mockup?
Samples are bought at the normal product price. Stock samples ship in 2–3 days and ULANTU pays the sample shipping cost.
Is there a minimum order quantity and what is the lead time?
There is no minimum order quantity on stock items, and stock orders ship in 2–3 days. Custom production takes 15–20 days once the requirement is confirmed.
Bring the comparison into a project brief.
Share the documented requirements and unresolved questions. An inquiry begins review; it does not confirm engineering approval, compatibility, stock, price, lead time, compliance or an order.
Prepare a project brief